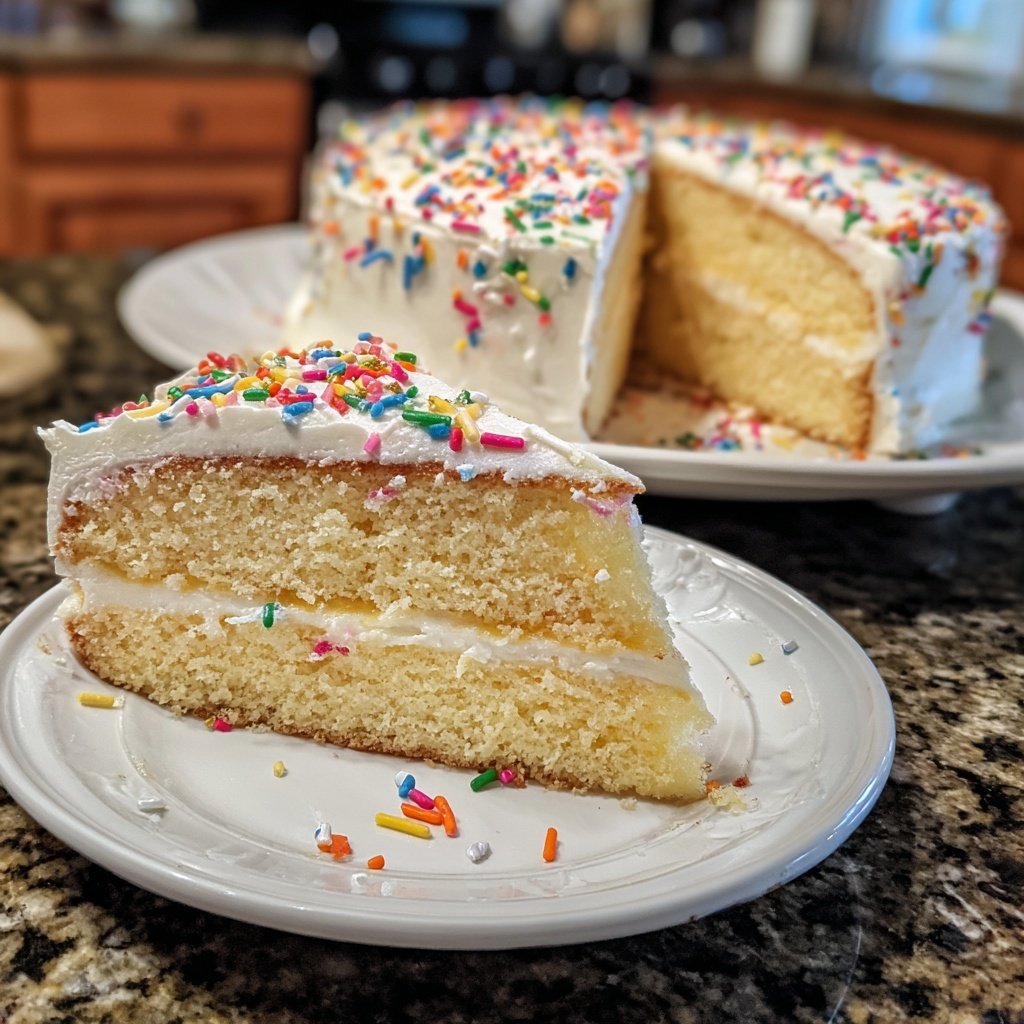
Classic Vanilla Birthday Cake
Highlighted under: Sugar & Whisk
I absolutely love making this Classic Vanilla Birthday Cake for special occasions. The rich vanilla flavor and fluffy texture bring back sweet memories of childhood parties. As I mix and bake, I can almost hear the laughter and feel the joy of celebrating with friends and family. It’s a nostalgic recipe that never fails to impress and allows me to create new memories with every slice. The ease of preparation combined with the delightful taste makes this cake a go-to recipe that I cherish.
When I decided to perfect my vanilla cake recipe, I experimented with various techniques. One of my favorite tips is to whip the butter and sugar until they are light and fluffy, which really helps air get into the batter. This small step makes a huge difference in texture, resulting in a cake that’s beautifully moist and tender.
Another key element is letting the cake cool completely before frosting it; this prevents the icing from melting. I use a simple buttercream frosting that complements the vanilla flavor perfectly, allowing each bite to be a delightful experience. It’s this attention to detail that keeps my guests coming back for more!

Why You Will Love This Recipe
- Light and fluffy texture that melts in your mouth
- Deliciously fragrant vanilla flavor that captivates the senses
- Perfect for birthdays and celebrations of all kinds
The Importance of Proper Mixing
When preparing the batter for your Classic Vanilla Birthday Cake, mixing is critical for achieving that light and fluffy texture. After creaming the butter and sugar, be sure to mix until the mixture appears pale and airy. This process incorporates air into the batter, contributing to the cake's rise and preventing a dense texture. If your butter is too cold, it won’t cream well, so ensure it is at room temperature for optimal results.
Another key aspect is incorporating the eggs while mixing. Add them one at a time, allowing each egg to be fully integrated before adding the next. This helps maintain the emulsion of the batter and yields a moist cake. When alternating dry and wet ingredients, mixing just until combined is essential—over-mixing can lead to a tougher texture, as flour develops gluten.
Frosting Tips for a Stunning Finish
The Buttercream Frosting is not just for flavor; it plays a crucial role in the cake's presentation. When making frosting, beat the softened butter until it becomes creamy and smooth, ensuring there are no lumps. Adding powdered sugar gradually reduces the risk of your kitchen becoming a sugary cloud and allows for better incorporation without graininess. If you find your frosting too thick, adjusting with heavy cream is the perfect solution; start with 1 tablespoon and increase until you reach a spreadable consistency.
Don’t forget about the temperature of your cake layers when frosting; they must be completely cool to prevent the frosting from melting. A helpful tip I use is to refrigerate the layers for about 30 minutes before frosting. This not only firms them up for easier handling but also helps the frosting maintain its shape for neat decoration. Consider using a bench scraper for smooth sides, and rotate your cake turntable for even coverage and a professional finish.
Ingredients
Get ready to create a masterpiece!
For the Cake
- 2 1/2 cups all-purpose flour
- 2 1/2 teaspoons baking powder
- 1/2 teaspoon salt
- 1 cup unsalted butter, softened
- 2 cups granulated sugar
- 4 large eggs
- 1 tablespoon vanilla extract
- 1 cup whole milk
For the Buttercream Frosting
- 1 cup unsalted butter, softened
- 4 cups powdered sugar
- 1 tablespoon vanilla extract
- 2-4 tablespoons heavy cream
Gather all your ingredients and let's get baking!
Instructions
Follow these steps to achieve cake perfection!
Prepare the Cake Batter
Preheat your oven to 350°F (175°C) and grease two 9-inch round cake pans. In a medium bowl, whisk together the flour, baking powder, and salt. In a large mixing bowl, cream the butter and sugar until light and fluffy. Add the eggs one at a time, mixing well after each addition. Then, stir in the vanilla. Gradually add the dry ingredients to the wet mixture, alternating with the milk, starting and ending with the dry ingredients.
Bake the Cakes
Divide the batter evenly between the two prepared pans. Bake in the preheated oven for 25 to 30 minutes, or until a toothpick inserted into the center comes out clean. Once baked, allow the cakes to cool in the pans for about 10 minutes before transferring them to a wire rack to cool completely.
Make the Frosting
In a mixing bowl, beat the softened butter until creamy. Gradually add the powdered sugar, mixing on low speed until combined. Add the vanilla extract and enough heavy cream to achieve a spreading consistency. Beat the frosting on high for about 2-3 minutes until it's light and fluffy.
Frost the Cake
Once the cakes are completely cool, place one layer on a serving plate and spread a generous amount of frosting over the top. Carefully place the second layer on top and frost the top and sides of the cake. Decorate as desired, and serve to celebrate!
Enjoy your homemade classic vanilla birthday cake!
Pro Tips
- For an extra touch, consider adding sprinkles or fresh fruit on top of the frosting for a colorful finish.
Storage and Make-Ahead Tips
This Classic Vanilla Birthday Cake can be made ahead of time! Both the baked cake layers and buttercream frosting can be stored in the refrigerator for up to three days. Wrap each layer in plastic wrap to prevent drying out. You can also freeze the unfrosted cake layers for up to three months. Just ensure they are cooled completely before wrapping securely. When you're ready to use them, thaw the layers overnight in the refrigerator before frosting.
If you plan to decorate the cake further, adding fondant details or fresh fruit, wait until just before serving. This will ensure your decoration looks fresh and appealing. Always store any leftover cake in an airtight container in a cool place for the best taste, and consume within three days to maintain optimal freshness.
Flavor Variations to Try
While this recipe shines with classic vanilla, feel free to experiment with other flavors. For a chocolate twist, substitute 1 cup of the flour with cocoa powder and use chocolate frosting instead. For a zing of freshness, add citrus zest, such as lemon or orange, to the batter and frosting for a delightful bright flavor. Remember to reduce the baking time slightly, as variations may alter how quickly the cake sets.
You can also incorporate flavor extracts into the frosting. Almond extract is a fantastic addition that pairs beautifully with vanilla. Just be cautious with the quantity, starting with half a teaspoon, and adjust to taste to avoid overpowering the vanilla base. These twists can create a tailored cake that still holds true to the original delight of a birthday celebration.
Questions About Recipes
→ Can I make this cake in advance?
Yes! You can bake the cake layers a day ahead and store them tightly wrapped at room temperature.
→ What can I use instead of eggs?
You can substitute each egg with 1/4 cup unsweetened applesauce or 1/4 cup yogurt.
→ How can I store leftovers?
Store leftover cake in an airtight container in the refrigerator for up to 5 days.
→ Can I freeze this cake?
Absolutely! Wrap the unfrosted layers tightly in plastic wrap and freeze for up to 3 months.
Classic Vanilla Birthday Cake
Created by: Fiona Carter
Recipe Type: Sugar & Whisk
Skill Level: Intermediate
Final Quantity: 12 servings
What You'll Need
For the Cake
- 2 1/2 cups all-purpose flour
- 2 1/2 teaspoons baking powder
- 1/2 teaspoon salt
- 1 cup unsalted butter, softened
- 2 cups granulated sugar
- 4 large eggs
- 1 tablespoon vanilla extract
- 1 cup whole milk
For the Buttercream Frosting
- 1 cup unsalted butter, softened
- 4 cups powdered sugar
- 1 tablespoon vanilla extract
- 2-4 tablespoons heavy cream
How-To Steps
Preheat your oven to 350°F (175°C) and grease two 9-inch round cake pans. In a medium bowl, whisk together the flour, baking powder, and salt. In a large mixing bowl, cream the butter and sugar until light and fluffy. Add the eggs one at a time, mixing well after each addition. Then, stir in the vanilla. Gradually add the dry ingredients to the wet mixture, alternating with the milk, starting and ending with the dry ingredients.
Divide the batter evenly between the two prepared pans. Bake in the preheated oven for 25 to 30 minutes, or until a toothpick inserted into the center comes out clean. Once baked, allow the cakes to cool in the pans for about 10 minutes before transferring them to a wire rack to cool completely.
In a mixing bowl, beat the softened butter until creamy. Gradually add the powdered sugar, mixing on low speed until combined. Add the vanilla extract and enough heavy cream to achieve a spreading consistency. Beat the frosting on high for about 2-3 minutes until it's light and fluffy.
Once the cakes are completely cool, place one layer on a serving plate and spread a generous amount of frosting over the top. Carefully place the second layer on top and frost the top and sides of the cake. Decorate as desired, and serve to celebrate!
Extra Tips
- For an extra touch, consider adding sprinkles or fresh fruit on top of the frosting for a colorful finish.
Nutritional Breakdown (Per Serving)
- Calories: 350 kcal
- Total Fat: 23g
- Saturated Fat: 14g
- Cholesterol: 85mg
- Sodium: 130mg
- Total Carbohydrates: 40g
- Dietary Fiber: 1g
- Sugars: 28g
- Protein: 3g